Pages

Monday, July 23, 2012

DIY Decorative Pillows

BACK TO CRAFTING!
Well, not exactly, but I do what I can without having all my craft supplies on hand while living at my in-laws' house. I have, however, taken FULL advantage of my mother-in-law's sewing machine-- a beautiful Singer just calling my name! I'm no sewing aficionado, but I can make the easy stuff, so if I can do it, YOU can do it :)
The other day I made two pillows and a pillow case. Here are the results:

Pillow #1:
This pillow cost me $.50-- because I took an easy-peasy tip from Jill and sewed two placemats together, inside out, leaving a few inches for stuffing. After flipping it the right way and stuffing it, simply sew the opening together by hand by using the slipstitch. For help with beginning sewing techniques and types of stitches, click here.

Essentially, placemats and napkins serve as precut fabrics for pillows. I bought these particular placemats at the Et Cetera thrift store in a set because they totally match my living room colors and style, but I saw some great napkins that would suffice for pillows with great patterns at Ten Thousand Villages for only $6.00 each. Honestly $12=batting and thread expenses is not that expensive for a personalized pillow :) To see their website, click here.

I don't have a picture yet because, well, honestly, I haven't stuffed it yet. Sorry!

Pillow #2:
Now this fabric was actually leftover from the pillowcase, so they are meant to coordinate on our bed. My inspiration came from some pillows on Pinterest (as usual): Pillows!
I only used three different fabrics, because I actually didn't plan on making this pillow, so I just used what I had on hand. The back is blue, and the front is a sage green and a funky pattern:

Once again, I don't have a picture of the final product because I haven't stuffed it yet.

Simply sew the front together (patterns facing each other so the seam remains inside the pillow) and you can replicate this for as many fabrics as you have (ah, the possibilities!!!!)
For the flowers, I actually used felt and sewed by hand, according to this blog's instructions: The Fickle Pickle.
I completed three flowers, like the pillow I found on Pinterest.


Pillowcase:
This was the most complex of the three, and yet, it wasn't too bad! Like I said, if I can do it, you can do it :)
Using the same fabric as above, I took 3/4 yard and added 3 inches of 1/2" hemmed coordinating fabric all the way around one edge. This first photo below is of the hem job: the key is pins and pressing!
The only change I made was adding the same fabric I used on the edge of the pillowcase to the edges of each tie, as shown below. Can I tell you a secret? It's because I made them toooooooo short!

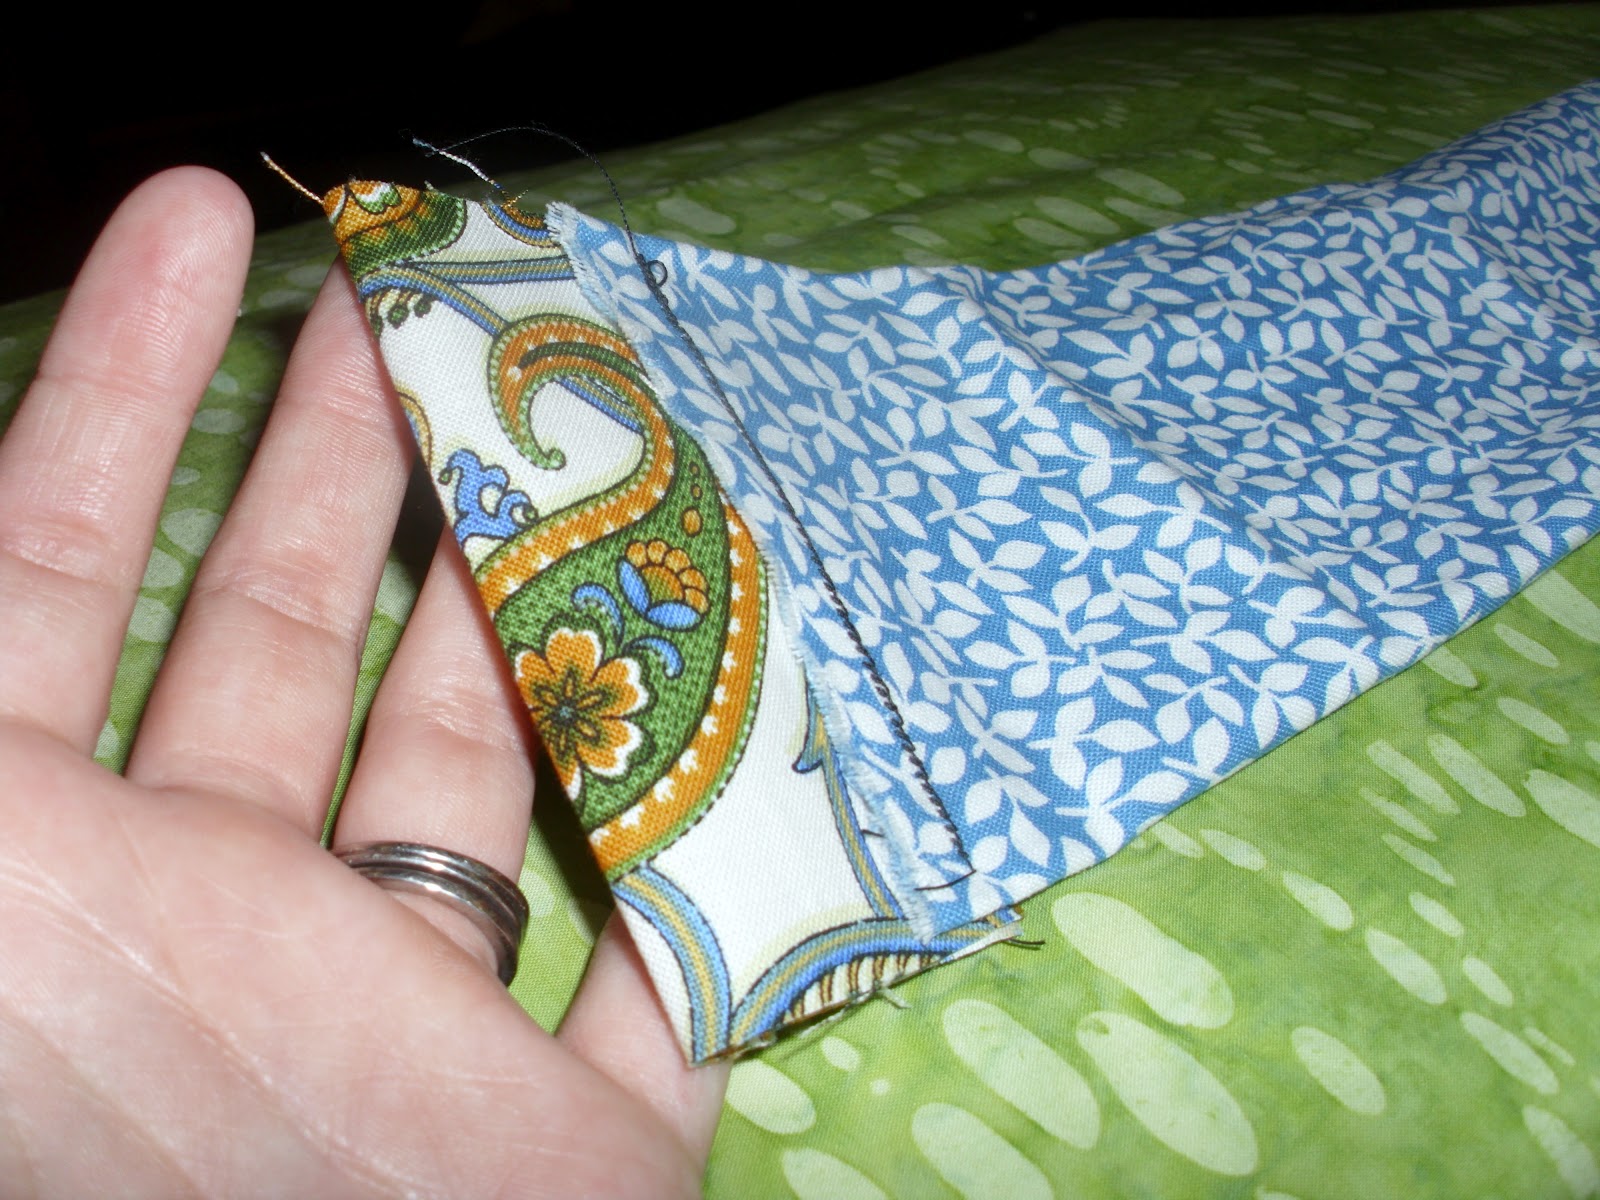
So, learn from me: MAKE THEM LONGER FIRST and then you can roll the edges inward and hem from there, as she suggests in the first place. I just didn't listen. Lesson learned!
Here is the completed pillowcase:


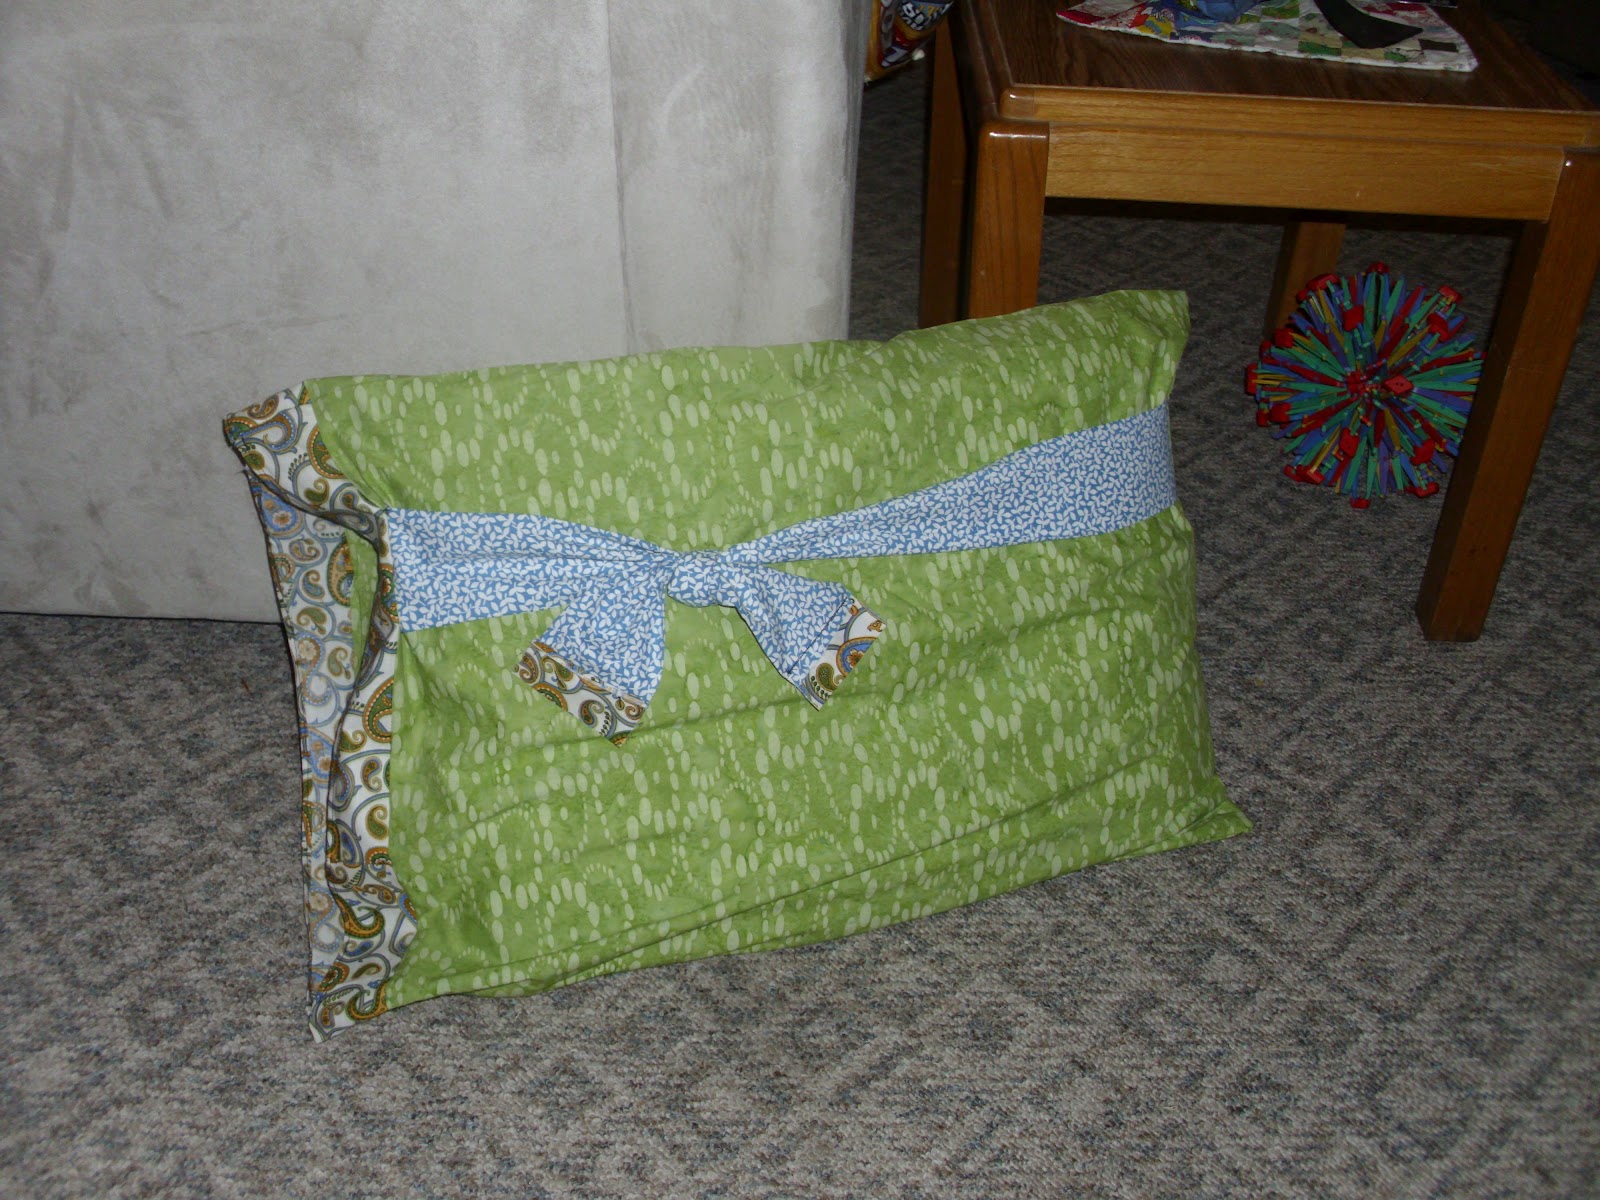
Phew! What an afternoon!
How I missed crafting :)


Saturday, July 21, 2012

REMODELING SERIES: THE BATHROOMS

This first photo is of the guest bathroom. We were too poor to replace the tub itself, but I scrubbed it raw! We first completed the tile the same as the kitchen's (since they are connected) and, in the process, purchased a new "throne." That was my idea. Sitting on like a seventy-two year old toilet did not sound like my idea of a good time. Both Nick and I utilized this shower instead of the master shower while it was being fixed up (this lasted for approximately the first 7 months we lived here. Oh, the curse of unfinished projects!) The walls were already textured (THANK HEAVEN!) but we added the bright yellow paint! The finishing touch: tileboard in the shower.
This is the second bathroom we revamped, the master bath. As you can see, the previous owners had wonderful taste AND skill. We tore it up. To say the least. First, we painted the walls Cigar Bar (a lovely orangey red brown), chosen to compliment a gorgeous shower curtain we got as a wedding gift from Bed, Bath, and Beyond. We then tiled the bathroom, and put in a new throne, like we did to the first bathroom. Like the guest bath, we used a tileboard to complete the shower area.
Oh ya! I forget! In both bathrooms, we replaced faucets and the tub/shower hardware. This is what took us the LONGEST because we kept running into problems with the plumbing. But my dear husband kept with it, and now we are good to go!
Since we already moved, I don't have photos of our the guest bath, but just know it was bright and yellow! Not a crazy yellow, just a cute yellow.
Here are the photos of our master bath, all finished and ready to go:

nosy little puppy!


This was the last post in my home remodel series. Get ready for a new adventure!

Thursday, July 19, 2012

Freezer Meals!

The first time I heard of "freezer meals," I was a little disgusted. I mean, I had never been able to put anything in the freezer without it becoming frostbitten or covered with those little icicle things. Ew!But when my sister-in-law Jillian suggested making freezer meals back in January when we were expecting our babies (who ended up being born within 9 hours of one another! SO much fun!) I was in no position to argue.

Here, less than six months later, I am hooked! I feel that my kitchen is revolutionized! I am a post-modern chef! Well, that's what make-ahead meals make me feel like, anyway. Tangible proof of this excitement was witnessed by my husband, as I broke out into a song with my own kitchen-esque lyrics to the tune of Little Mermaid theme song. His reply: "Nice job, Ariel."

I was honestly so energized by the massive amonts of time that I had (more to spend with baby and husband!) that I could not resist delving into researching this new and exciting "field." Now, to clarify, I don't think I can be one of those "Once A Month Moms," simply because I enjoy cooking, so I'll plan on fresh meals weekly, supplemented by the pantry inside my freezer. These will come in especially handy when I am watching Nick's basketball or football games in the evening, or as our children grow up and we become busier with each succeeding day!

Anyhoo, I spent all last week searching for golden recipes, planning my grocery trip, shopping for said groceries, and preparing meals from those groceries.
This isn't all of it! Just what we didn't have yet. Thought my husband hates it, I love grocery shopping! hahah

 
Monster cookies! Fourth of July style!


I'm not above making cookies in large batches and then freezing them ahead. This is  how I do!
Before beginning the cooking, pop some potatoes in the oven, at 350 for an hour.
They only freeze well cooked-- I've heard they turn black if you freeze them raw!


This post  will have two parts: freezer meals tips that I've learned along the way and easy make ahead recipes. I am by no means a professional-- none of this is my original idea, but instead I have done online research and collborated it here.


PART I: TIPS FOR FREEZING STUFF
1. Gather recipes that require limited ingredients. If you see a recipe that calls for just tons of ingredients you don't have, your grocery bill will stack up quickly. This is all about using what you have well and living on a budget!
2. Make sure you make a list of the meals you plan on making with the groceries you buy. I know this sounds obvious, but you don't want to get home and be like, "What was this onion for again???" Waste of money and time!
3. Start with plenty of materials. Ziploc bags, aluminum trays, aluminum foil, Saran wrap. If you are low on any of these things, add it to the grocery list.
4. If you have kids, any number of any age, don't expect to do everything in one day. In fact, don't even try. Startegically plan to do 1-2 meals per day for say, a week, or whatever works for your schedule.
5. A very easy way to make freezer meals without taking up too much time is to simply double your recipe and freeze half!
6. When freezing Ziploc bags full of freezer meal, use a cookie tray to freeze first. This will help the meal to freeze flat so it takes up less space in your freezer.
7. Freeze entire cooked chickens to have on hand for recipes that require cooked chicken, namingly casseroles. This will save lots of time in the long run!
8. Feeze outside the box! Things besides just meals freeze well also! Like I mentioned before, cooked chicken can make life a lot easier. Also freeze fresh vegetables that come in great quantities (like the GINORMOUS zucchini I recently got from my aunt Bekka), breads (banana bread keeps awhile in the freezer so you can make double!), smoothie packets (just add the fruit and other ingredients to bags and cut them open in the day of!), and even pancake mix (just thaw before use).
9. Do your research to keep track of what can go in the freezer and for how long-- you don't want meals to spoil and your hard work and money down the drain!
10. Last, make some sort of spread sheet or Word document that tracks the meals you make so that you always know waht's in the freezer and nothing's forgotten! Also, this makes you feel accomplished as the meals rack up! YAY!

PART II: RECIPES THAT YOU CAN FREEZE
Once again, most of these are not my recipes, so instead of typing out the entire recipe, I'll provide the link, and therefore, the credit.  Here are a few I tried last week:
1.When the Dinner Bell Rings
2. Excellent Book: Dinner's in the Freezer
3. Freezer Meals for Us
4. Once a Month Mom
5. A Turtle's Life for Me

AND there are plenty of other resources out there! Simply google 'freezer meals,' 'make-ahead meals,' or 'dump meals.'
I have really enjoyed being organized, prepared, and discovering new recipes! I hope you guys can take some of my advice and have some organized fun with this!


Monday, July 16, 2012

REMODELING SERIES: THE BEDROOM

First, I would just like to ask, WHAT THE HECK?


Who thinks it would be a good idea to use WOLVES in the bedroom wallpaper? Honestly people! GET SOME TASTE!


After seeing the before pictures, it's easy to tell that most of the needs are sheerly cosmetic, but there are a lot of them! I'll give you a list to show what we've done:
1. Painted. We used a light green from Lowe's Valspar collection.
2. New carpet. The blue just wasn't cutting it for me.
3. Painted the trim. Looking back we should have done this before the c arpet was installed, but honestly, we just didn't have the time-- we had to have the carpet in so we could move in!
4. Wainscoting. I have loved the look that gorgeous clean wainscoting provides- instant style!
5. New doors and blinds. Much needed!

After Pictures:


Not the cleanest my house has ever looked, but when you are in the process of moving, what else can you ask for? This room was one of my favorites after its completion-- I got some of the best sleep of my life here!

Only one more post to go one this remodeling series! Watch out for REMODELING SERIES II coming... whenever we find a house to live in!


Sunday, July 15, 2012

My Life in Boxes...

Moving is so difficult! I feel a new sense of empathy for families constantly on the move, especially those forced to move because of work or finances. It's like what is familiar to you is suddenly gone, what you know is just a memory. Leaving our house, the house that we brought home our baby boy to, the house that we spent countless hours gutting and regutting, revamping, primping, remodeling, beautifying, and all the other words that describe all the blood, sweat, and tears poured into each room, brought me to tears! Nick told me to "turn off my emotional switch" as we slowly emptied our house of our furniture and belongings, and thus our memories. How do you just flip the switch? Ugh, men.

My life in boxes. It's overwhelming the number of boxes coming out of our house and resting dusty and lonely in storage. I know that possessions are far less important than people (obviously), but there is something to be said about being established through having your own style displayed for all to see! Yet my style is in boxes. Dusty and lonely. 

We are waiting for God to show us our home, not just a house. The HOME that we will bring more babies to. The one that we will create new memories in. The one that he has planned as our shelter and tangible refuge. The one that will hold our style, our good times and bad.


Monday, July 9, 2012

Things Don't Always Work Out

Things don't always work out.

That may sound like an obvious statement, but it is so devastating when you experience it firsthand.

Something you were counting on. Something important. Like a HOUSE.

So, the house we were planning on buying and renovating is no longer an option. We received an apologetic call from our realtor saying that the listing agent had accepted a cash offer, despite having already "sold" the house to us. Not only were we used as the backup plan for this listing agent, we were also betrayed by his schemes.

It is hard to see why God would "do this to us," although I am reminded that he does everything for a reason that we may never know the answer to. I am just praying that he has a house more suitable to our needs set aside for us. Possibly he was preventing us from living in a crime-riddled area of Wichita, or maybe he needs us to live near neighbors who need to hear the gospel.

Whatever it is, glory be to God!

So here we are, scratching our heads in confusion with our hearts aching in frustration, and yet we know we are called to make this move. We walked back to Square 1, holding our heads up high, as we search for the RIGHT house, this time, not just a house.

Thanks for your prayers, or thanks for just letting me vent a little bit :)


Wednesday, July 4, 2012

REMODELING SERIES: THE NURSERY

It is funny looking back at this, becuase we had no idea we were going to have a baby. And we decided (probably by the goodness of God) to make this house a two-bedroom by inserting a dividing wall (which I already talking about in my post about the living room).

Now that we have little 4-month-old Rylan, we couldn't be happier that we have a room to put him in! Here's another funny part-- we painted it this bright blue before we even knew we were expecting! And he's a boy! Oh, the irony.

So anyways, since I'm crunched for time before the next remodel we are doing (beginning July 18!) I am going to take the lazy route and utilize a previous post I made about cute babies' rooms.

Here's the link:

It was so much fun getting to make the bedding with my mother-in-law, and now seeing it in use by my little man is even better! 

Stay tuned for only two more posts on the remodel in this house, one on our bedroom and the bathrooms! 
Thanks!