Pages

Showing posts with label DIY. Show all posts

Monday, September 17, 2012

The Hubby's Gift to Me: DIY Chalkboard!

Aw, he is so sweet! My dear husband saw this super cute and yet surprisingly expensive chalkboard ($80!)at World Market, one of my favorite home decour stores. He decided to recreate it, and it wasn't even a gift for any occasion, just a pleasant surprise :)
I think part of that comes from his desire to be engrossed in a project. He is a "project guy," if you will. You know you have a "project guy" if he:

a) becomes easily frustrated by boredom
b) usually does not allow himself to become bored
c) spends his down-time finding ways to make himself more busy
d)  becomes frustrated when a project is not brought to completion

Sound familiar? Maybe it's just a man thing, but I know my dad is this way too. It's like they have trouble relaxing because there are so many things in the world that they could create, alter, or even destroy and rebuild! They're right when they say that you marry a person similar to your family :)

ANYWAY, here is a photo of the model my husband was copying:
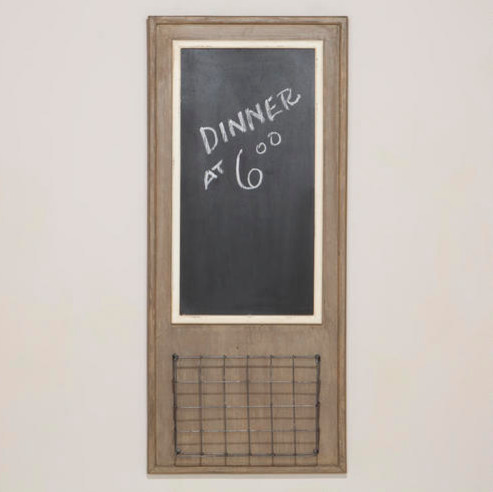
He knew I would love this basic chalkboard and decided he could easily make it himself, and with a few modifications, he succeeded! He also made one for his sister and mother (WHAT A HUNK!)

SO
He got some scrap plywood from the garage and measured it the size he thought appropriate, more square than the model. He then painted it, using one of my favorite colors that I plan on infusing into my kitchen (whenever we have a place to live). Click here to see Eucalyptus Leaf from Home Depot's Behr collection.

He bought some half round trim board that had a 1/4" radius and used it to outline where the actual chalkboard was going to be. He taped it off and used chalkboard paint to fill in the inside of the square. He actually used premade chalkboard paint, but I know it's all over Pinterest how to make your own (which I would recommend because the chalkboard paint is expensive to buy and cheap to make.)
 This is the product to date-- he plans on using some decorative hooks on the bottom (you can never have too many hooks!) And someday we'll find the perfect tray/ wire basket to hang directly beneath the chalk part.

I plan on hanging it above a table of treats and writing some cute and whitty catchphrase that means, "Help yourself," or "Eat your heart out," or something to that effect.

My husband is so sweet for knowing how much I love to decorate and even being willing to contribute to the vice :)


Tuesday, August 28, 2012

Organic Baby Food-- Homemade is Cheaper!

I'm going to preface this post by saying that my sister-in-law Jillian has turned me on to so many things in life that I enjoy, and making homemade baby food is one of them. I do this in an effort to a) be stingy, b) provide organic baby food to my son. Unfortunately, I would say that a definitely comes before b in this case (I mean, how bad can baby food from the jars really be?)

But I have decided that if it is easier and cheaper then I will do it myself. For example, mashing a banana (or ten for the freezer) and mixing it with formula is not only an excellent source of nutrition for little Rylan, but it is also a tasty treat that can last three or four meals that only cost me $.20. That will be forever the cheapest that I ever feed him! And super easy :)
Look at that mischevious little face! I cannot resist it, even with avocados all over it!

Jillian and I got together a few weeks back and made baby food out of the following produce:

Bananas: Mush then puree. Easy as 1-2-3. Actually there are only two steps there so it would be easy as 1-2. just proving to you all that I can count. And I do it well. All the way to three. Anyways, Rylan loves them-- he sucks bananas RIGHT off the spoon. Hilarious!
Squash: Some of babies' first foods can be squash. It must be cooked first (in the microwave is fine), and it can then be put in the food processor, sans the seeds and skins. Squash doesn't go very far though, and it will be one of the more expensive ones you may try.
Sweet Potatoes: Bake. Deskin. Puree. Freeze. Vwala!
Avocado: Scoop out the insides and mash well.

All of these foods can be frozen except the avocados. Apparently you need to freeze avocado WITH other things in it to prevent it from going bad, like lemon juice, which I'm pretty sure the little ones should not have yet. But you can just scoop and mash the day of and keep the remainder in an airtight jar-- the top may go brown, but you can remove it with a spoon and still serve what's underneath.
*Never freeze formula. If you need to thin out your baby food, you can freeze it thick and ass formula later.

Then in Colorado about two weeks ago, my aunt had peaches FALLING off her trees-- and we all know how delectable Colorado peaches are! So I pitted and deskinned about ten of those and made at least 15 meals out of the pureed form, depending on how well the little man likes them, but they are in the freezer for now.


To thaw: Use the refrigerator or micowave, not the countertop. For some reason that's bad. I find that 2 oz of bananas defrosts in the microwave in less than ten seconds, but you are going to want to make sure your container is microwave safe (I bought some the other day that I discovered are not).

A source that we used was: Wholesome Baby
They provide awesome recipes, nutritional facts, scientific research, and even menus for your baby's age! This was perfect for me since I'm an amatuer mom!

Thanks for reading!


Wednesday, August 15, 2012

Happy Birthday Mommmmmmmmm!

Phew! The secret is out! I had to wait until my Mom's birthday to make this post because the it contains a tutorial (kind of) of her gift! I made her living room pillows to match her living room rug!Here's the rug and room I attempted to match:


So, I copied this tutorial almost exactly: DIY DISH
Fabric Measurements for 16" pillow are as follows:
Front- 1 6x17" strip, 1 2x17" strip, and 1 9x17" strip.
Back- 17x17" square of coordinating fabric. 
This is a photo of the strips sewn together and the pillow sides turned inside out, ready to be sewn.

For the flowers, I utilized felt and simply followed the tutorial on the DIY DISH, using different colors, of course.


The result:
Unstuffed pillows!
 Hope she likes them!


Tuesday, June 26, 2012

REMODELING SERIES: THE LAUNDRY ROOM

EW!


Nasty little room, but it's nothing a couple coats of paint and some new flooring can't fix!


Nick was so gracious to tile the place a neutral tan. Why neutral, you may ask. Wellllllllll, I have an excellent answer!

PURPLE WALLS!

Magnificent, aren't they? Purple has been my favorite color since I can remember (although I am a huge fan of almost any color done right!)

With some shelving....

and some additional decorating...

 
The laundry room is transformed! Thank goodness too, because that dirty mint green just wasn't doing it for me...


Saturday, June 2, 2012

Dinner Menu Printable

Sometimes I feel like dinner occurs at the wrong time of day. Nick gets home, it's time to feed Rylan, and all the sudden I have to make dinner! Sometimes it's a scramble, but I think I've come up with a decent system for planning and organizing meals. Below is an image (that you can download, copy and paste into a Word document, and use at your leisure) that has really helped me manage that chaos.

I usually know what's for dinner a week in advance because seeing the layout visually helps me understand what else is going on in the week. For example, I know that Tuesdays are our dinner group with friends from church, but on Monday I sometimes accidentally panic, thinking, What's for dinner tomorrow?!!?!? Maybe that's just me, but this just helps me. Plus, I can plan out what groceries I need to buy in my limited trips to Manhattan by writing down the ingredients I don't yet have in the groceries column.

Maybe this can help others too! Happy cooking!


Sunday, May 27, 2012

DIY Spring Wreath

I know it's summer, but I started this project in the spring (that just goes to show how little time I've had to craft lately), so I'm calling it a spring wreath, even though it's versatile enough to carry through the summer :)

Looks like a great start to an afternoon of crafting- Doritos and Oreos and milk :)
Start with some of your favorite coordinating colors of yarn, felt, and buttons. Also have a styrofoam wreath handy! Decide on your main color and wrap the yarn around the wreath alternating colors to your liking.
 I periodically dot the wreath with hot glue to make sure to yarn stays where I wrap it. After it's wrapped to completion, you can set that aside for a while as you'll be working on the decorative felt flowers. I used several colors and several different types of flowers, and you could get away with any variety of them.
The first I used was a basic hippie flower. Cut one length of your felt sheet like this:


The number of "humps" you have will depend on their size and shape. You could make each petal pointy, or more oval shape, depending on personal preference. Then you'll take your sewing needle through the bottom if the petals with just a basic weave stitch.Once you've made it all the way through, connect the ends and secure with a knot, as shown to the right.


The second type of flower that I made was a "scalloped" flower.

Here's a link to a great tutorial that explains it much better than I could:

Scalloped Felt Flowers

I would have done several more types of flowers, but I lost motivation. But if you search "felt flowers" on Pinterest, you will see a bunch of other options-- some of them are so cute!


Once I had everything gathered together....

I arranged the details in a pleasing manner around the wreath, securing with hot glue. I added buttons and green felt leaves where I thought it was lacking. A good tip: Cover up any imperfections in your wreath with the flowers! This worked well for me :)
The final product, hung and all:


Sadly, this will be my last crafting post for a while. Since my life is in boxes, it is very difficult to find the time to get everything together to craft. But I have great things in mind! And plus, then I will also have some (hopefully) great posts about a NEW home to remodel :)

Thanks for viewing!


Thursday, April 26, 2012

DIY Scrapbook Paper Wallflowers

As Rylan and I have figured out more of a daily schedule, I've had a little more time to get crafting and scrapbooking. The morning goes one of two ways: I either can't fully wake up and go right back to sleep after he eats, OR I get motivated by how messy my house is. On those lucky motivated days, I usually have some time to myself in the late afternoon that I spend scrapbooking (I have done about 6 pages of Rylan's baby book!) and the occasional craft.
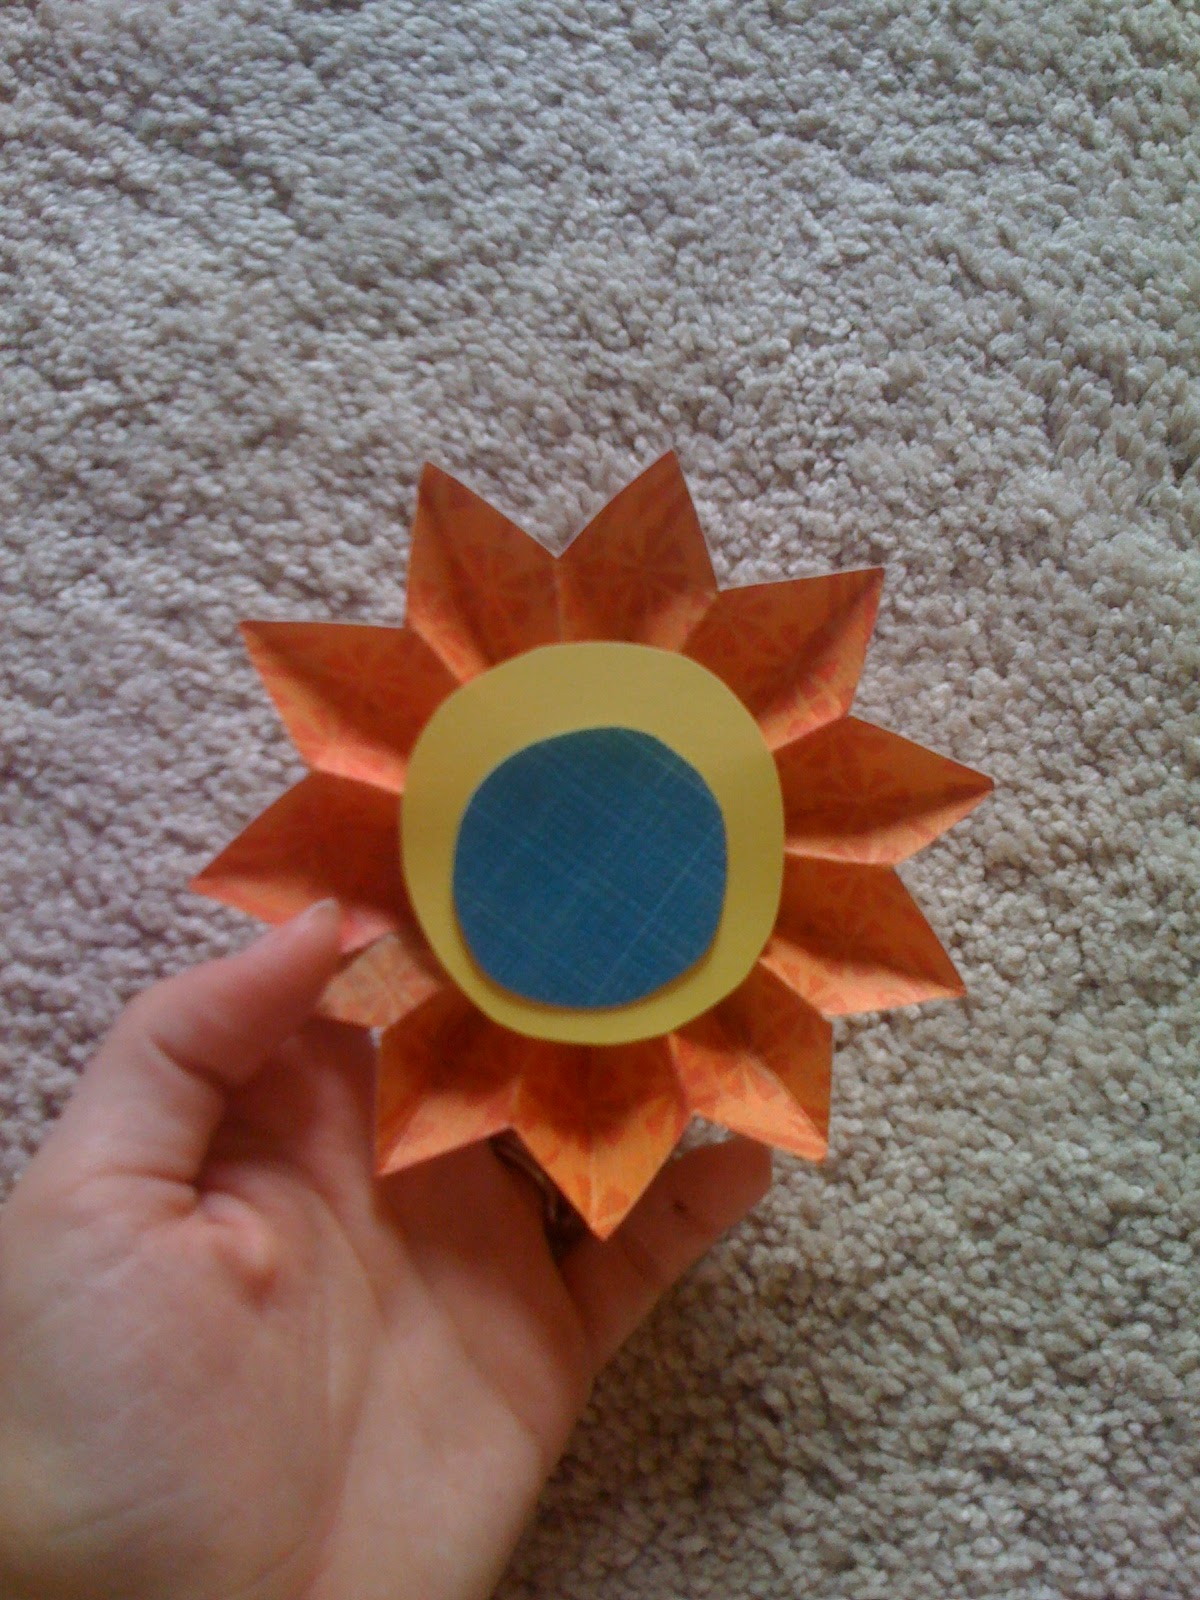
This project took me a few days last week to complete. It started out really frustrating for me, but I like the way it has turned out! These scrapbook paper wallflowers were the perfect springtime addition to our dining room!

1. Choose! To make these flowers, pick out some of your scrapbook paper in several different coordinating patterns. Decide beforehand which ones you want to use for the center of the flowers, the petals, and other accents.

2. Cut! In order to form the petals, your scrapbook paper needs to be at east 20" long (the longer the easier- trust me!), but mine wasn't, so I had to use tacky glue to adhere two pieces together. The widths of the paper will vary depending on the size you want your flowers, anywhere from 2.75" to 5 or 6." In the picture above, the small orange flower is the 2.75" width and the large polka dot flower is has a 5.5" width, with the others varying in between.

 Left: Score the edge of one length in whatever fashion you want: the small orange flower is demonstrated below, a basic repeated triangular score. Other types include a more jagged, thin triangular score, small slits, or even wavy lines (as seen on the blue/green flower in the large picture above).


3. Fold! Accordion fold the paper in relation to the score- marks on the edges, as seen to the right. I made the mistake with this flower (my first) of making the folds too large, so smaller folds, though more difficult, will also be more beneficial. Be sure that your folds remain aligned with one another.


4. Bond! Glue the edges of the folded paper together to form a tube. When the glue is secure and dry, gently push down on the un-scored edge of the tube until it flattens. Mine were never able to fully flatten, so gluing the back was difficult- I used hot glue for this part since it hardens quickly and holds paper well. Then I simply cut out two circles of coordinating paper for the center. You can use other items to be creative as well: buttons, fabric, beads, pearls, bling, anything!

5. Repeat! Use an appealing variety of colors, patterns, solids and shapes!

6. Show off! Hang your masterpiece somewhere it'll POP! To connect them, I used hot glue and balsa wood to create a stable foundation for all the flowers. To hang them, I (shamefully) used tape! But it worked, so I guess I'll just call it "using my immediate resources" instead of "being straightup tacky."


Hope you enjoy this project as much as I did!

Friday, April 20, 2012

CUTE DIY Burp Cloths


Thanks to Pinterest and a day well-spent with my dear sister-in-law Jill and her trusty sewing machine, I now have CUTE burp cloths to use. Because using the un-cute ones just wasn't good enough for me. Oh no.

To cute-ify my burp cloths, I bought the Gerber birdseye cloths diapers and several swatches of fabric from Wal-Mart. Note that my fabric is not the appropriate gender-- it is feminine. Just because I have a boy doesn't mean that everything I own has to be blue and red.So I branched out.


After pre-washing everything, all we did was cut the fabric the appropriate size to cover the rectangular middle section of these burp cloths that bows out. Jill sewed while I picked out my bells and whistles (i.e. additional decorations, such as ribbons and buttons.)

So easy!


Saturday, March 31, 2012

EASY DIY Book Display

This is probably the easiest DIY ever posted and it can make a huge difference in the way a room looks! Ok, so I love books. I think have over a billion. But I have no where to put them because I have always though displaying them can be so tacky (unless you are one of those amazing people who can strategically arrange them by color gradient or possibly by height- you are a Real Man of Genius!) I am no good at arranging things and I love matchy-matchy things............ so I can't believe I didn't think of this sooner!!!!!!

OK! Is it lame that I am THIS excited to share this? This was my book display before my breakthrough. Meh, nothing to write home about. Lame attempt at color coordination if you ask me.


BUT! Then I saw this idea in a Better Homes and Gardens magazine, which I read religiously.

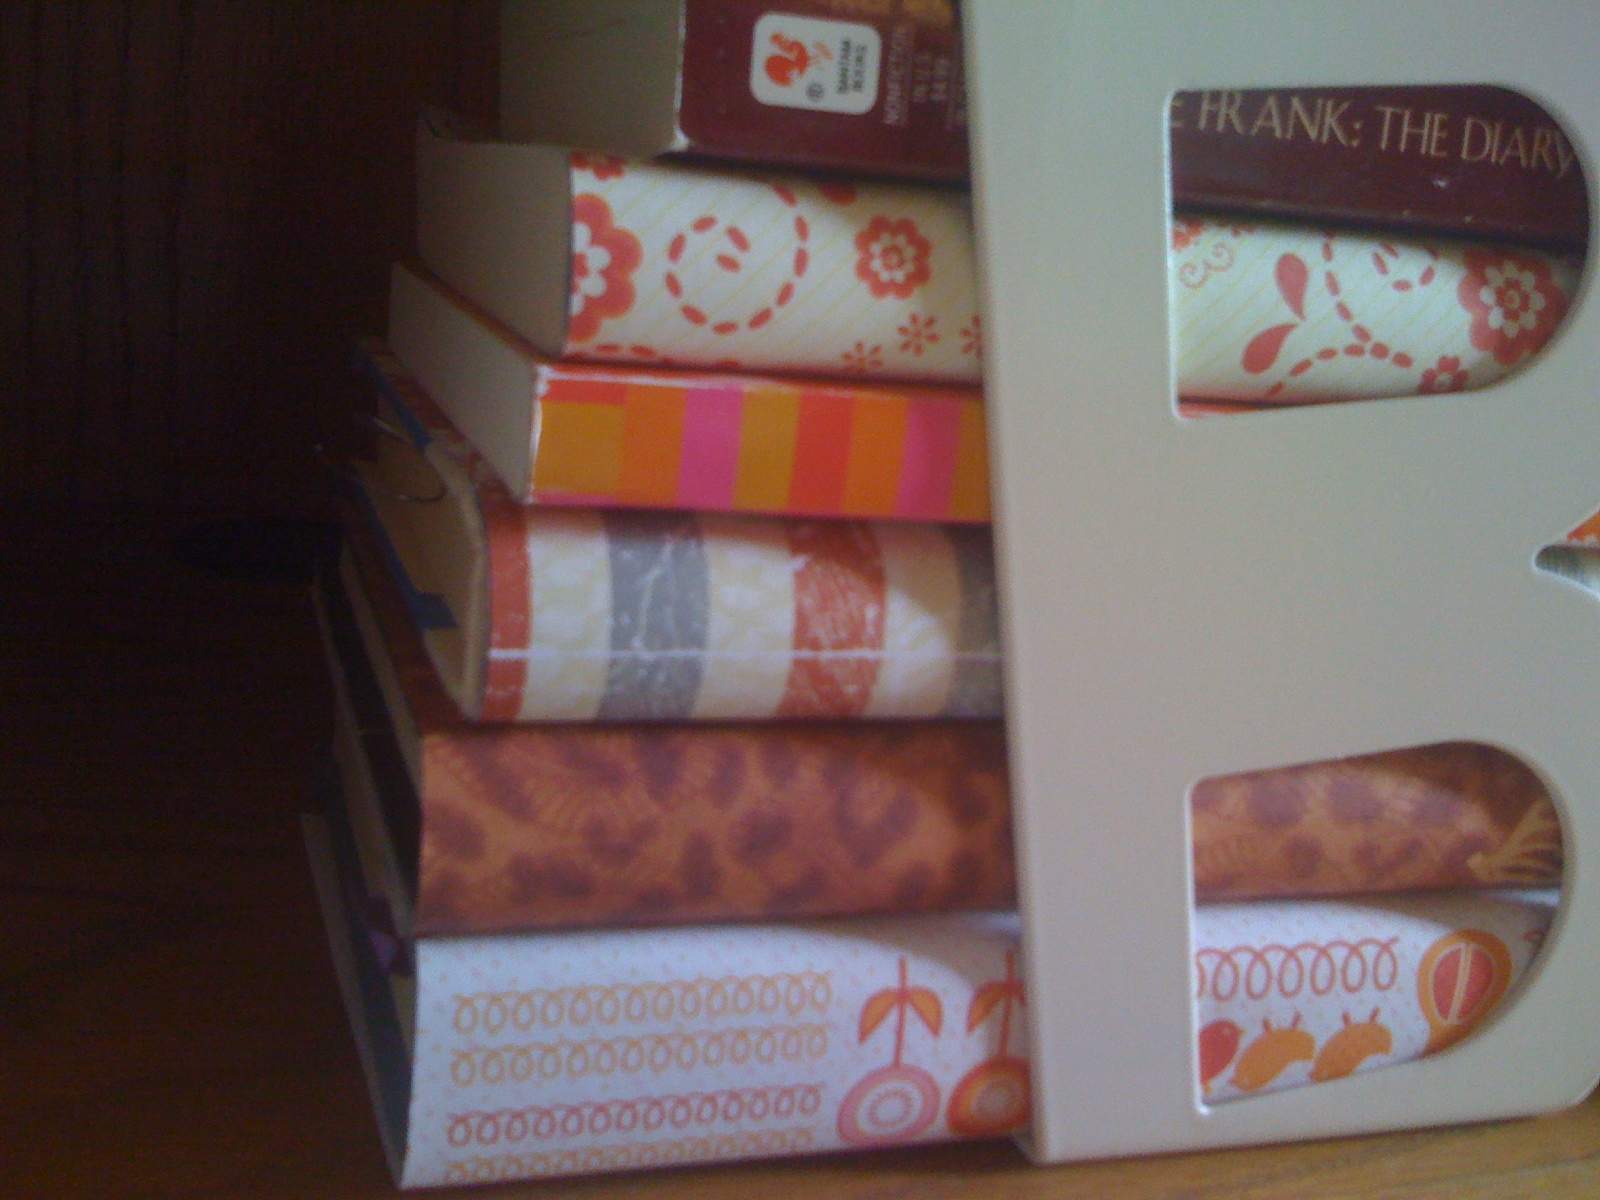
Gather: FUN scrapbook paper and at least 7 books of varying size
Cover the books with the scrapbook paper. Repeat. That's EASY!

For some books I was able to just take the paper to the cover. For others (antiques or paperbacks), I decided to fold over a leaf of paper inside the front and back covers.

To quickly keep the books straight, I wrote the titles just inside. See Gone with the Wind to the right.

Here's the "after" display:


Ta-DA! I love my new matchy-matchy books! 
How fun! I think the patterns are fun yet subtle and they complement the room and its colors.

Please also note my amazing IKEA purchase, a giant B bookend. I love Ikea

Try it yourself! Use your own paper and creative book arrangement. Enjoy!


Monday, March 26, 2012

Yard Work, Shmard Work

Colorado tends to be a bit behind Kansas in the changing of seasons, probably because of that dry Western air. In fact, during the fall time, I would try to pick out one weekend to go home from college after the leaves had turned in Kansas just so I could see them do the same in Colorado, the window was small but my Sophomore year, I hit it perfectly! It was enrapturing.

As Nick and I returned from our Spring break adventure to Colorado, we felt like we had stepped from the mountainous frigid air into a lush spring garden, just a state away. Everyone's lawns in Clay Center were green and freshly mowed, garden beds were inundated with new buds and blossoms, just teeming with life! We stared out the windows of the car in amazement.

And then we pulled up to our house.... EW! We realized just how much work needed to be done! Though the air was humid and buzzing with spring insects and birds,  our house seemed to be a few steps behind. It seemed saggy, lonely, bedraggled. Leaves scattered our patchy yellowed grass and the bushes surrounding our house ran wild. No flowers bloomed at the Brown's house.

Something  HAD to be done about this. SO yesterday we all packed up into Nick's truck and we went yard/lawn shopping at Menard's!

Then today, we put it all to practice. First, Nick raked the leaves. 28 bagfuls. And the problem STILL wasn't taken care of! We just ran out bags....


Then, he mowed the yard and replanted grass where it should have been all along. He also completely swept the front and back porches (my hero!) and watered all the new plantlife. Yay Nick!


My job was the cosmetics, i.e. the flowers. We had bought pansies, violas, rose bushes, rudbekias, hosta plants wildflowers, etc. and now I had to decide where to put them. And I discovered that potting soil is not my friend at all! But here's how it turned out:


Hopefully the pansies to the left perk up a bit after some tender loving care!


 Thanks to the Goodwill, I got this gorgeous green pot dirt cheap, and filled it with some hydrangeas (maybe that's what those pink things are called??) and purple/yellow pansies.

OOOOOooooooooooooooooooooooooooh!!!!!!!!!!!
And of course this amazing six-plant pot, courtesy of my aunt as a wedding gift from Ten Thousand Villages (I LOVE this place!) is filled with violas that are already starting to look a little less sickly (which was my ultimate goal).

Please ignore the color of our house, as it is subject to spontaneous change at any moment.


I love the tulips, but alas I cannot take credit for them. I didn't plant them- they just seem to grow like weeds around our cement. We intend on digging up the bulbs to relocate them.


Hopefully I have inherited my grandma Orange's green thumb. She is an amazing gardener and I would love to (someday) acquire that status, although, as we can see, that is going to take a lot of work and even MORE faith!!!!

This is the big picture:


Still nothing to be too amazed about, but the house has come such a long way! And, yes, I may have chosen to paint our front door orange, and it may have turned out brighter than anticipated.... and we may be embracing it!!!!!!!!!!!!!!!!!!!!!!!


I think it is my mission in life to convince EVERYONE that orange is the best color ever!