 |
| Looks like a great start to an afternoon of crafting- Doritos and Oreos and milk :) |
I periodically dot the wreath with hot glue to make sure to yarn stays where I wrap it. After it's wrapped to completion, you can set that aside for a while as you'll be working on the decorative felt flowers. I used several colors and several different types of flowers, and you could get away with any variety of them.
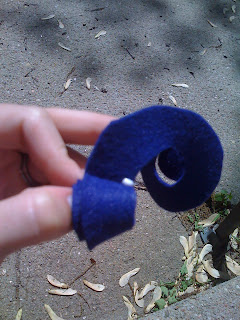
The first I used was a basic hippie flower. Cut one length of your felt sheet like this:

The number of "humps" you have will depend on their size and shape. You could make each petal pointy, or more oval shape, depending on personal preference. Then you'll take your sewing needle through the bottom if the petals with just a basic weave stitch.Once you've made it all the way through, connect the ends and secure with a knot, as shown to the right.

The second type of flower that I made was a "scalloped" flower.
Here's a link to a great tutorial that explains it much better than I could:
Scalloped Felt Flowers
I would have done several more types of flowers, but I lost motivation. But if you search "felt flowers" on Pinterest, you will see a bunch of other options-- some of them are so cute!
Once I had everything gathered together....
I arranged the details in a pleasing manner around the wreath, securing with hot glue. I added buttons and green felt leaves where I thought it was lacking. A good tip: Cover up any imperfections in your wreath with the flowers! This worked well for me :)
The final product, hung and all:
Sadly, this will be my last crafting post for a while. Since my life is in boxes, it is very difficult to find the time to get everything together to craft. But I have great things in mind! And plus, then I will also have some (hopefully) great posts about a NEW home to remodel :)
Thanks for viewing!


No comments:
Post a Comment